 I promise this will be my last post concerning Christmas trees from the 2012 holiday season. But I could not share this story with you until all of the gifts had been given.
Many, many moons ago I did some Christmas crafting, and made some ever so cute fabric Christmas trees. At that moment in time I was a young mom, and would craft my little heart out and sell them at a Christmas boutique every year. Fun memories.
Over the years I lost my fabric Christmas tree, and had not made any new trees for quite some time. Then when we were visiting my sister in October, she told me that she had to throw her little tree out because it got moldy. I was so sad for her I knew exactly what I would give her for Christmas.
I scoured my Babe Cave (aka the sewing room) looking for my old Christmas tree pattern and I could not find it anywhere. Oh Boo! So of course I went to JoAnn’s found the pattern (so elated McCall’s still had this pattern), got my supplies, and went home to make trees. By the way I already had the fabric. I had purchased it on clearance last Christmas season.
I decided to make one for my sister, one for my brother, and one for myself. We would all have the same tree from the same fabric. Kind of cheesy I know, but I’m cheesy and traditional like that.
So here’s how they go together:
The trees are made from a McCall’s Crafts pattern 3777.
For each tree you are making you cut out 6 pieces of the tree pattern. You can also use contrasting fabrics, so in that case you would cut 3 pieces from each fabric. I’m going to be making some trees with contrasting fabrics for next Christmas.
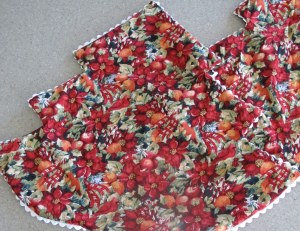
The next step is to baste either rick-rack or some type of lace around the edges. You baste 1/2″ from the edge. This step is completed only on 3 pieces of the trees. Leave the other 3 plain to form the tree sections.
Next, sew two pieces right sides together, and leave an opening on the bottom according to the pattern. Be sure you have one piece with your trim, and one without. Trim your seams, and clip the corners and curves. Turn the pieces right side out and press flat. You should now have three pieces to stitch together to form your tree.
Lay two of the sections on top of each other and baste through the center according to the pattern. The pattern piece has a line for you to trace to follow for this portion of the stitching. Lay the third piece on top of the two you have previously basted together. Line up your edges, etc. and pin in place. Stitch through all three layers. You should now have six openings in the bottom of the tree. This forms six sections that will be stuffed to form the tree.
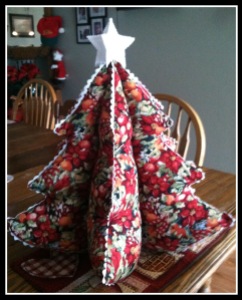
Once you finishing stuffing and plumping your tree, you stitch the openings closed, add a star and voila a nice little tabletop tree for years to come. The beauty of this pattern is that you can choose very simple or very elegant fabrics. You could embellish with mini ornaments, or ribbon bows. The sky is the limit.
And a funny side note to this story- as I was assembling the trees I was making I started digging around in one of my little Christmas storage bins. In the bottom of this bin there were some pattern pieces all folded up nice and neat. I unfolded the pieces and there were some patterns for a few different ornaments. The last piece I unfolded was my old, old pattern for the fabric Christmas trees I had made so long ago. I laughed to myself for a few minutes, and got back to my sewing.
I’m thinking next year of making some plaid trees for the younger crowd in the family. Or maybe polka dot trees for the girls and plaid trees for the boys. Time will tell, we’ll have to wait and see. If you like to sew, and are a crafter at heart give this pattern a try. It’s a lot of fun.


