Tag Archive for salsa

Chile Rellenos Casserole

One of my favorite recipes to materialize from my garden harvest this summer, was this recipe for a chile rellenos casserole from my Better Homes and Gardens cookbook.  It’s cheesy, got lots of flavor from the jalapenos, and super easy to throw together.  It’s a great dinner side dish, or it would make a wonderful casserole for a brunch.


Ingredients:

  • 2 Large, fresh poblano chile peppers, fresh Anaheim chile peppers or green sweet peppers (8 Oz)
  • 1 Cup shredded Monterey Jack cheese with jalapeno peppers or mexican blend cheese
  • 3 eggs, beaten
  • 1/4 cup milk
  • 1/3 cup all-purpose flour
  • 1/2 tsp. baking powder
  • 1/4 tsp cayenne pepper
  • 1/8 tsp salt
  • 1/2 cup shredded Monterey Jack cheese with jalapeno peppers or mexican blend cheese
  • Picante sauce (optional)
  • Dairy sour cream (optional)

Directions:

1) Pre-heat the oven to 450°.  Quarter the peppers and remove the seeds, stems and veins.

2) Submerge the peppers into boiling water for 3 minutes, and then drain well.  Turn them over and pat dry with paper towels.

3) Place the peppers in a well-greased 2 quart square baking dish, and top with 1 cup of the cheese.

4) In a medium bowl combine eggs and milk.  Add flour, baking powder, cayenne pepper, and salt.

5) Beat until smooth with a rotary beater.  Pour egg mixture over peppers and cheese.

6) Bake uncovered, for about 15 minutes or until a knife inserted into the egg mixture comes out clean.

7) Sprinkle with the 1/2 cup cheese, and let stand about 5 minutes or until cheese melts.

The finished product should look something like this:

Oh, so pretty with the green of the jalapenos peeking through the cheese.  I do have to say that you must remember that I am the “spice weenie” in our house.  So I only added half of the cayenne pepper that this recipe calls for.  Next time I make this I promised the family a “little” heat will be added to the mix!

What’s your favorite casserole dish?

Naomi’s Roasted Veggie Salsa

There are a ton of jalapenos to be used up from my recent garden harvest.  One of my favorite ways to use the jalapenos is in my daughter, Naomi’s roasted salsa.  My daughter got me hooked on her salsa the first time I tasted it, and being the “spice weenie” that I am it’s amazing that I liked it at all.  She roasts fresh veggies, and throws everything in the food processor for a yummy, yummy treat.  This recipe has become a family favorite for all of our family  get togethers. 

Now here’s what you need to do to make it.

Ingredients:

  • 8 big tomatoes
  • 3 mild jalapeños
  • handful of cilantro
  • 1/2 of a white or red onion
  • garlic salt
  • a couple of splashes of el pato tomato sauce
  • * Note – for a milder salsa clean the seeds from the jalapeño, and slice in half before roasting.

 Directions:

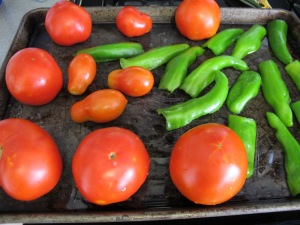
1) Rinse your veggies, and toss them on a big cookie sheet.  The jalapenos are de-seeded and sliced in half for my roasting purposes.  Since I’m the spice weenie.  I don’t want the heat.

2) Pre-heat your oven to 350 degrees and bake for 15 minutes.

3) Then turn your oven to broil, and cook the veggies for an additional 10 minutes.

4) After the veggies are cooked,  cool them in the fridge overnite,  or for at least 6 hours.

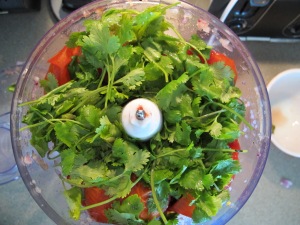
5) To put the salsa together pull out your favorite food processor.

6) Put the onion in the food processor in quarters, and chop until very fine.

7) Cut the center from the tomatoes, and either quarter them or cut them in half for smoother processing.

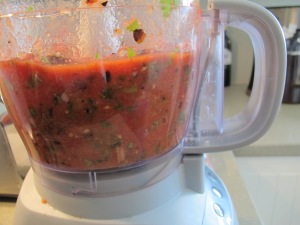
8) Place the remaining ingredients in the food processor, and pulse only for a thicker,  chunkier salsa. 


9) I pulse for just a few seconds and then check the consistency before pulsing again.  This is consistency that I like to have for my salsa.  Can you see the little bits of roasted jalapeno?  This gives the salsa such great flavor. Yum!


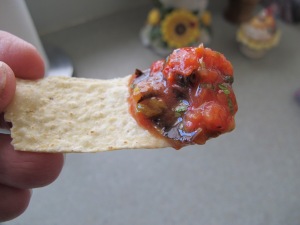
10) This next item is very important in the salsa process.  Get your favorite tortilla chips out of the cupboard, and taste test the salsa  to be sure you have enough garlic salt, and the heat is the way you like it.  You can also designate an official taste tester, but I prefer to do my own tasting.

11) I only like my salsa very mild (the spice weenie effect), so these directions don’t include a lot of ingredients for the heat.  If you want or like the extra heat; leave the seeds in the jalapenos, and add additional el pato sauce.

This is a wonderful fresh salsa.  You can use it in your favorite guacamole recipe, as a garnish on tacos or burritos.  The sky is the limit.   If you enjoy the roasted veggie flavor this is a great staple salsa that you can make all on your own.  I’m off to the kitchen to make my next batch.  Have a great weekend everyone.

Red Enchilada Sauce – Homemade Variety

Two weekends ago  we had a great family weekend here at the Party House.  My sister, Laura, and her husband were here visiting from Montana, and we had a great weekend together. Laura had a red sauce recipe that she wanted to share with the entire family, to use on chicken enchiladas.  The preparation for the big dinner on Saturday night started the day before on Friday afternoon.

Laura and I decided it would be best to make the sauce itself on Friday, let it veg and simmer, and mesh with flavor until Saturday afternoon.  So on Friday afternoon, Laura took charge of the kitchen to make the sauce.  Here’s the recipe from Laura:

 Ingredients:

6-8 oz. whole dried chilis – Laura uses Ancho chilis which are fairly mild.
2 tsp. Mexican oregano
4 cloves garlic
2 cups chicken stock (or water)
1 tbsp. lard or olive oil
1-1/2 tbsp. flour or arrowroot powder
1 tsp. salt

Heat griddle or skillet until a drop of water sizzles on it. While heating, remove stems and seeds from chilis under running water. Gloves are recommended! Toast chilis on griddle until aroma is released – 30 to 60 seconds – do not burn! Put toasted chilis in a bowl and cover with boiling water. Soak until soft – 10 minutes. Drain chilis and discard liquid.


                             Lots of work getting the chili’s ready!

Place chilis, stock, oregano and 2 garlic cloves in blender or food processor, and puree until smooth. Add more stock if too thick. Work puree through sieve into a bowl – discard solids. Pour in a little more liquid to rinse sauce through sieve. In medium saucepan, heat oil or lard until rippling. Add the other two garlic cloves, pressing down in hot oil with the back of a spoon to release flavor. Remove when brown.

Add flour, stirring until golden. Add chili puree and salt, cook over low heat about 10 minutes.

Now, please remember we were making this sauce for a group of about 16 or 17, give or take a friend.  Laura quadrupled the recipe for our gang.  Our goal was to make (2) 13×9 pans of chicken enchiladas coated with the red sauce, and a pan without tortillas, as  some of our family members are eating carb-free meals.  And we wanted a bit of sauce to mix in with some rice.

For the enchilada assembly you will need:

  • Chicken – The chicken breast was cooked in the crock pot for 5-6 hours on low.  Two crock pots with about 10 chicken breasts total.  Place the chicken in the crock pot, sprinkle the chicken with your favorite taco seasoning, add about a cup of chicken broth, turn on low.  When the chicken’s ready you can shred it or chop it, whichever your recipe prefers.
  • Black beans, drained and rinsed.
  • Sautéed onions.
  • Shredded mild cheddar or co-jack cheese.
  • Corn tortillas.

Once the onions are sautéed, add the black beans to heat them up.  Then mix the beans and onions in a large mixing bowl with the shredded chicken.  We mixed in a skosch of the red sauce just to moisten everything before baking.

For the assembly you need extra pairs of hands and you will make a mess with this step.

  • Dip the corn tortilla in the red sauce, and scrape off any excess on the side of the pan you are dipping in.
  • Pass the tortilla to the enchilada filler person.
  • Put a scoop of the chicken, bean, onion mixture in the middle of the tortilla.
  • Have the person in charge of the cheese  sprinkle cheese on top of the meat mixture.
  • Roll the tortilla up and place in your baking dish.
  • Keep assembling and rolling until your baking dishes are filled.
  • Pour the remaining red sauce over the enchiladas, and sprinkle cheese on top.
  • When making these for a crowd it’s ok to put a double layer of enchiladas in the 13×9 pan.  Just use some of the sauce in between layers.
  • Bake for 20-25 minutes at 350 to heat them up.
  • Once the baking is complete, get those enchiladas on  your dinner plate and enjoy!

                                                         Assembly in progress.

                                              Finished pan right before the cheese.

To finish out our dinner menu we also had rice with some of the sauce mixed in, homemade salsa (thanks Naomi), wine, and our favorite almond champagne.  The only thing missing from the dinner was Travel Man, and our youngest son.  They were both working.

Try this recipe soon, your taste buds will love it!  Thanks for schooling us on the sauce recipe Laura.  Cannot wait to make this one again.

What’s your favorite enchilada sauce – red or white?

 Photo credits- Joan Weise, Erica Bettencourt, and me.  Thanks everyone for remembering to take a few pics!

Taco Salad for a Crowd

For the past two or three days it has been over 90 degrees here in So Cal, just a hint of summertime coming our way.  The hot weather calls for some lighter and yummy dinners.  Tonight I made the gang a  Taco Salad.  I called my Mom to find out the origin of this recipe, and we came to the conclusion that I was a recipe that was passed around the neighborhood when we were growing up.  However, I have put my own twist on the recipe, with the help of my daughter Naomi.

Ingredients:

  • 1 lb. ground turkey or ground beef (whichever you prefer)
  • 1 can of kidney beans (15 oz)
  • 1 pkg of taco seasoning
  • 1 bag of fritos (10½ oz)
  • shredded cheese (we like the cheddar & monterey jack combo)
  • shredded cabbage
  • tomatoes
  • green onion

Directions:

  • Brown the meat, and drain off the grease.
  • Drain the beans and add them to the browned meat.  I like to do this to heat up the beans.
  • Mix in the taco seasoning and the amount of water that is called for on the package.
  • Simmer this mixture until you have cooked off almost all of the liquid.
  • While the meat is simmering;
  • Chop up the tomatoes
  • Chop up some green onions.
  • Chop the shredded cabbage into smaller bite size pieces.
  • Crush the fritos, in the bag, with a rolling-pin.  Open the bag a bit first though to let out the air.

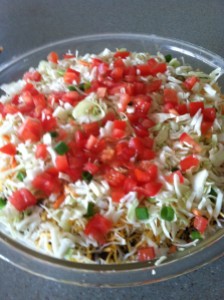
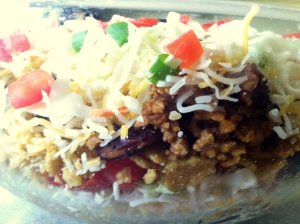
    Salad Layers

For the salad assembly: 

  • The layering effect is Naomi’s twist on the recipe.
  • In a large glass bowl layer the ingredients like this:
  • Fritos
  • Meat and beans
  • Cheese
  • Shredded cabbage
  • Tomatoes
  • Green Onion
  • Then repeat the layers for a second time.
  • You can either serve the salad layered, or if your adventurous like me you can toss the whole salad and serve.
  • For garnishments put out your favorite salsa, sour cream, and black olives (that’s ones for you Hilary!)

Variations:

  • This recipe can easily be made with shredded chicken or beef.
  • You could add additional cans of different types of beans (black or pinto).
  • You could flavor the meat with your favorite salsa instead of taco seasoning.
  • Any garnishments that you like can easily be put on top or served with your salad on the side.

This is truly a yummy recipe, and so easy to throw together.  Oh and I like using the shredded cabbage because it does not get soggy at all.  I put out the cabbage when we have just plain old tacos in the shell too.  For this twenty-something household, this salad makes a great big meal and is great for staying on budget.  If you’ve never made this before it’s a real treat.  If you haven’t made it in a while you’ve been missing out like me.  I’m definitely mixing this recipe in with my weekly summertime meal planning. 

Please stay tuned for my Mom’s Taco Salad recipe for Two.

  • Subscribe to Blog via Email

    Enter your email address to subscribe to this blog and receive notifications of new posts by email.

    Join 1,175 other subscribers

Skip to toolbar