Archive for Gardening

I Need a Garden Plan.

Yes folks we are presently heading into the third week of  February.  I live in Southern California, the land of sunshine and warm weather.  I have got to get my garden plan together early this year.  Got to!!  Last year I had a pitiful tomato harvest, and I’m sure one of the reasons this happened was just because I started way too late.  I have vowed, mostly to myself, that this year I WILL get my garden going earlier, get the tomatoes started earlier, and cross my fingers for a bountiful harvest.

After quite a few rainfalls over past month or so, this is what my garden plot currently looks like.  There are a few raised garden beds off to the right of this photo, and they are the only thing weedless in the garden right now.

1-how did this happen

The weeds, of course,  have completely taken over and dashed any hopes I may have had of making this an easy Spring clean up.  I say Spring because it’s Southern California, and as soon as the rain slows down for us it is Spring.   Flowers are blooming, weeds are bustling, the time is right for getting ready to plant.

My plan for this Spring is to try to add one more raised bed, and of course the weeds will be obliterated before any other activities can begin.  My favorite veggies to plant are; zucchini, green beans, tomatoes, butternut squash, bell peppers, and jalapenos.  We had a bumper crop of jalapenos last year, and they make for great cooking all year round.  Oh and I will definitely be adding some cucumber plants for making our yummy homemade pickles.

Getting the soil ready for planting is definitely the most time-consuming part of the gardening process.  Over the next two weeks Travel Man and I will be rototilling, digging and raking all of those rotten weeds out-of-the-way.  We have a fairly good-sized composter that will have some pretty magnificent dirt in it right about now.  This premium dirt will get added to one of the existing raised beds to make the soil all healthy and wonderful for the new garden.  Then we’ll finish making all the dirt really pretty and smooth so we can get the planting going.

I’m looking forward to getting this year’s garden going, and getting some dirt under my fingernails.  There’s something so refreshing about digging in the dirt.

Are you planting a garden this year?

The Great Family Pickle Experiment

IMG_0117-001
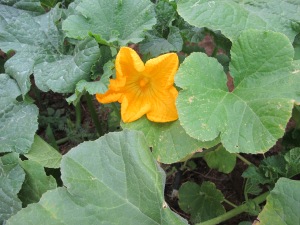
Do you like pickles?  Are you a kosher dill person or a bread and butter pickles person?  Travel Man and I like the kosher, dill variety.  Yum, yum.  My Dad was the first one to make homemade pickles, over the summer.  His recipe uses a whey liquid to ferment the pickles in the refrigerator.  The first batch he made turned out spectacularly well.  They tasted great.  Good flavor, nice crunch.  He’s had some difficulties duplicating that first batch, and that inspired me to find my own recipe.  Oh and I forgot to mention I grew my own cucumbers too.  The baby plants survived a 108 degree heat, and we have had a nice crop of pickling cucumbers over the past few months.

IMG_0149-001
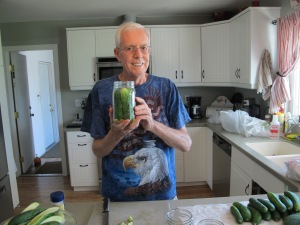
This is my Dad.  We made a big batch of pickles in my kitchen over the summer, and had quite an assembly line going.  Travel Man helped him get the cucumbers ready.  They measured all of the spices into the jars, added the whey liquid, and voila they were ready to go into the refrigerator.

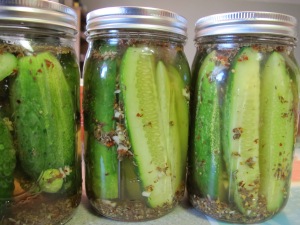
This is my Dad’s recipe.  It has a kosher style flavor, and lots of crunch.

JIM’S DILL PICKLES

Makes 1 Quart

Ingredients: 

    • 6-8 Pickling cucumbers
    • 1 tablespoon mustard seeds
    • 1 clove garlic, chopped
    • 5-6 stalks of fresh dill, if in doubt, add more
    • 1 tablespoon sea salt
    • 4 tablespoons whey liquid
    • Filtered water-no chlorine!

Directions:

Wash the cucumbers to remove dirt. Cut into halves or quarters. Trim length, if necessary.  Add mustard seed and garlic to the quart jar.  Pack cucumbers tightly into the jar, adding dill as you go.  Mix the sea salt and whey liquid in 2 cups of water and pour over the cucumbers. Add water to cover the cucumbers, fill to about 1 in. below the top of the jar.  Seal the jar and invert once or twice to mix the liquid.

Keep at room temperature for 3 days and then store in the fridge. The pickles will be ready to eat in 3-4 weeks.

The whey liquid is made from yogurt. One large container will give you enough whey liquid for 4-6 jars.  Place a towel over a strainer and add the yogurt. The whey liquid will drip through slowly.  When it stops, tie up the towel loosely and let it drip some more. Once it stops, the milk solids  can be saved as cream cheese. This will keep for a week or 2 in the fridge.

This is a slow process, allow one day to produce the whey liquid. You can store it in a glass container in the fridge. It should keep for several months.

IMG_0004-001

The recipe Travel Man and I used is from food.com.  These are our new favorite pickles.

Refrigerator Kosher Dill Pickles

Ingredients:

Pickling Liquid-

    • 1-1/2 cups water, boiled and cooled
    • 1 cup white vinegar, 5% acidity

For each quart jar add-

    • 1 tablespoon kosher salt
    • 2 tablespoons dill seeds
    • 1/4 tsp. celery seeds
    • 1 tsp. mustard seeds
    • 1 tsp. mustard flakes
    • 1 tsp. red pepper flakes
    • 1 bay leaf
    • 2 garlic cloves, minced
    • 3-6 cucumbers (depending on size)

Directions:

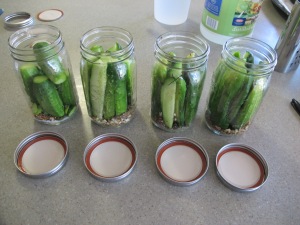
Add the salt and spices to each jar.  Add cucumbers sliced, whole (ends trimmed) or spears, packing them in tightly.  We also added the trimmed ends, and they made little pickles chips.  Fill the jar to within 1/2 inch of the top.  Add pickling liquid to cover the cucumbers.  Put a lid and a ring on the jar.  Shake the jar for a few seconds to distribute the salt and spices evenly.

Refrigerate the pickles for 7 days (Travel Man was opening them on the 4th day!).  Shake the jar for a few seconds everyday during the first 7 days to keep the salt and spices distributed.   The finished jars will last for approximately 6 months in the refrigerator.

IMG_0009-001IMG_0011-001

The one caution that I have about this recipe is watch out for the red pepper flakes.  They make the pickles quite spicy, and me being the spicy weenie that I am,  I could have done without them.  As a matter of fact our second batch had no red pepper flakes.  They were amazing.  Great flavor, good crunch.  I know I have mentioned that before, but they really taste so good.  The pickling cucumbers will definitely be a staple in the garden next year.  Our next adventure with the kosher dill recipe will be to make pickle chips, oh yum.  I will update you once those are completed.  Hopefully this week.

If your feeling adventurous, want to try a new recipe, and like pickles try one of these recipes.  You’ll be glad you did.  Remember each of these recipes is written for (1) one quart jar.  I had a lot of fun getting the cucumbers going in the garden, and then making some great pickles that Travel Man and my Dad enjoyed.  Most recently a jar went home with my sister to Montana.  This could become a nationwide phenomena.

This post linked to the GRAND Social

Naomi’s Roasted Veggie Salsa

There are a ton of jalapenos to be used up from my recent garden harvest.  One of my favorite ways to use the jalapenos is in my daughter, Naomi’s roasted salsa.  My daughter got me hooked on her salsa the first time I tasted it, and being the “spice weenie” that I am it’s amazing that I liked it at all.  She roasts fresh veggies, and throws everything in the food processor for a yummy, yummy treat.  This recipe has become a family favorite for all of our family  get togethers. 

Now here’s what you need to do to make it.

Ingredients:

  • 8 big tomatoes
  • 3 mild jalapeños
  • handful of cilantro
  • 1/2 of a white or red onion
  • garlic salt
  • a couple of splashes of el pato tomato sauce
  • * Note – for a milder salsa clean the seeds from the jalapeño, and slice in half before roasting.

 Directions:

1) Rinse your veggies, and toss them on a big cookie sheet.  The jalapenos are de-seeded and sliced in half for my roasting purposes.  Since I’m the spice weenie.  I don’t want the heat.

2) Pre-heat your oven to 350 degrees and bake for 15 minutes.

3) Then turn your oven to broil, and cook the veggies for an additional 10 minutes.

4) After the veggies are cooked,  cool them in the fridge overnite,  or for at least 6 hours.

5) To put the salsa together pull out your favorite food processor.

6) Put the onion in the food processor in quarters, and chop until very fine.

7) Cut the center from the tomatoes, and either quarter them or cut them in half for smoother processing.

8) Place the remaining ingredients in the food processor, and pulse only for a thicker,  chunkier salsa. 


9) I pulse for just a few seconds and then check the consistency before pulsing again.  This is consistency that I like to have for my salsa.  Can you see the little bits of roasted jalapeno?  This gives the salsa such great flavor. Yum!


10) This next item is very important in the salsa process.  Get your favorite tortilla chips out of the cupboard, and taste test the salsa  to be sure you have enough garlic salt, and the heat is the way you like it.  You can also designate an official taste tester, but I prefer to do my own tasting.

11) I only like my salsa very mild (the spice weenie effect), so these directions don’t include a lot of ingredients for the heat.  If you want or like the extra heat; leave the seeds in the jalapenos, and add additional el pato sauce.

This is a wonderful fresh salsa.  You can use it in your favorite guacamole recipe, as a garnish on tacos or burritos.  The sky is the limit.   If you enjoy the roasted veggie flavor this is a great staple salsa that you can make all on your own.  I’m off to the kitchen to make my next batch.  Have a great weekend everyone.

The Colors from My Summer Garden

This afternoon I have been working on getting the summer photos organized.  There are just a few that I want to share with all of you from my garden.  Especially since the summer gardening season is winding down for many of us “green thumbs”.

First up – the lovely jalapenos.  Mild and yummy just for me, since I’m a huge “spice weenie”.  I don’t like the heat, just the jalapeno flavor.  I’ve harvested close to 8 dozen of these beauties.  Can’t wait to share my daughter’s roasted salsa recipe with you. 

Next up – the mini pumpkins.  This is a Burpee variety of pumpkin, called Small Sugar.  They can probably be used for pumpkin baking, but for my purposes they will most likely just be decorating the house for fall.

Then there are the sunflowers.  Evan and I had planted the huge, big sunflowers, and right after they bloomed they got attacked by this ugly fungus and I ended up chopping them down.  But they were gorgeous for a little while.

There were also had the small sunflowers, which made a great backdrop in the garden. I had cut some of these and brought them in the house too.  But, they still had so much pollen dropping I only did that once.  They were a little messy, but very sunflower pretty.

Then there was this little sunflower, and I think he was saying, “Do I have to wake up today?”  Kind of funny.

Last flower of the day is the lovely zucchini blossom.  I took a lot of pictures of these blooming, because the flowers are huge.  This is one of my favorites.  I’m still harvesting a few zucchini, and making all kinds of baked goodies from them.

Now I am in the process of planting for a winter crop of cucumbers, sweet corn, spinach and lettuce.  This is the first year I have attempted plantings after the summer harvest.  We are fortunate here in California to have a second growing season, and this  year I will be taking advantage of it.

How did your garden grow this summer?  What is your favorite fruit or veggie from your summer garden?

The Garden Leaves are Everywhere.

This year in my garden I have zucchini plants, pumpkins, butternut squash, watermelon, and sunflowers.  All of these plants have amazing leaves.  I’ve been a little mesmerized by the different shapes and sizes of the leaves from each plant.  And I don’t know that I ever realized or paid much attention to the distinctive leaves of each plant.

Zucchini leaves are huge.   All of the leaves protect the blossoms in one way or another.  The zucchini leaves are by far the largest of them all.  And isn’t it amazing how the leaves protect the plants, and camoflauge them?  I was picking some zucchini tonight, looked at the same plant twice before I realized there was a really good-sized zucchini laying right on the ground, in plain sight.

Pumpkin leaves are next.  I was also trying to get pictures of the little blossoms.  They spread out in long trails, so make sure you have lots of room to plant and let them grow.  Pumpkins are in the foreground.  The leaves in the background are a patch of sunflowers.

The watermelon leaves have a shape and size all their own.  Very curvy and a little lighter green than the squash family of plants. These leaves trail out into the garden too.  sometimes those trailers have to be redirected so they don’t get tangled up in a fence or a tree.  And look at my little baby watermelon, so cute. This picture was taken about a month ago.  The melon is about 3 or 4 pounds now.   This is the first time I’ve ever grown watermelons.  I’ll let you know how they turn out soon.

Then there’s the butternut leaves.  Very similar to the pumpkins in shape and size.  These leaves trail all over the place.  I have a big area designated just for the bountiful butternuts!

The sunflowers were planted just for Evan. Actually he planted these seeds himself, and has been watching their progress over the summer.  Evan’s method of planting the sunflower seeds was just pushing them into the mud in this little patch we designated for them.

It is still so amazing to me that one little garden can produce so much greenery.  I’ve just been fascinated by all of the leaves and greenery.  The way the squash family of plants,  in particular, have a natural way of camoflauging, or become an umbrella to the vegetables underneath is a wonder all its own.

Did you have you garden this summer?  Do you have a green thumb?  If you only planted one thing in your garden my vote would be for a zucchini plant, For me they have the most amazing leaves of all.  Happy gardening everyone.

  • Subscribe to Blog via Email

    Enter your email address to subscribe to this blog and receive notifications of new posts by email.

    Join 1,175 other subscribers

Skip to toolbar