Archive for Food

I think I have an obsession with coffee

Last week when I was unloading the dishwasher I had a freak kitchen accident.  Have no fear no one was hurt, except for my coffee pot.  I was putting away this small glass bowl, it slipped out of my hands, and bounced off of the carafe of the coffee maker.  The bowl survived, but the coffee carafe had a gaping hole in it.  After cleaning up the mess I went on my merry way doing other things around the house.  (This happened at dinner time.)

The next morning I wanted my cup of coffee.  I think I became a little grouchy at this point, very unlike me.  Then I foraged in the kitchen and found some Taster’s Choice samples and got a cup of coffee. Yay!  I felt much better.  Over the weekend we did not rush out to buy a new coffee pot, and I had a few Taster’s Choice samples to use up.  They were not as good as the “real thing”, but they would suffice.  Travel Man and I were going places and working on a house project over the weekend, I did not want to take time out to shop for a coffee pot.

Then this morning my wonderful,  Travel Man went to the store for a few things and came home with a new coffee carafe.  Oh, and he also bought some additional Taster’s choice as a back-up just in case the carafe did not work out.  I realized just a few minutes ago I think I’m obsessed with having my first cup of coffee in the morning.  This was quite an aha moment for me.  Now mind you I don’t drink coffee all day, just first thing in the morning.  It’s my morning routine.  And when my morning routine was off,  I felt off-balance all day long.

So to start my week off right I am sitting here enjoying my morning coffee.  Life is good when everything in my world is in balance.


Fluffy Lemon Cheesecake – No Baking Required

As I promised you all earlier in the week I wanted to share my cheese cake recipe that I made for my daughter’s birthday bonanza last weekend.  Hilary had originally requested a lemon cake with cream cheese frosting.  But being the persuasive mother that I am I asked her if she would rather have lemon cheesecake, and she said Yes!

Oh and by the way, I also had two graham cracker crust staring at me from my pantry just calling out to be used.  See what I mean about be persuasive. 

So the ingredient list looks like this:

  • 1 graham cracker crust – store-bought or from scratch, whichever you prefer.
  • 1 (8oz.) package of cream cheese, softened
  • ½ cup sugar
  • 1 (8oz.) container of Cool whip, thawed
  • 2 tsp lemon juice
  • 2 tbsp lemon zest

Blend the cream cheese, sugar, and lemon juice together until smooth.  Fold in the Cool Whip and about 1½ tbsp of the lemon zest, save a smidge for a garnishment.  Pour the mixture into the graham cracker crust, and sprinkle the remaining lemon zest on top.  Chill in the fridge for at least 2 hours.  This is a very light and yummy cheese cake.

A few variations of this recipe- some food for thought so to speak:

  • You could use lime juice and lime zest.
  • Leave out the citrus flavorings all together and garnish with fresh fruit – strawberries or kiwi.
  • Use no flavorings in the cheesecake, and top with a thin layer of sour cream.
  • This is a great recipe for making individual mini cheese cakes – my niece loves to make these.  You can purchase the mini graham cracker crust at your local grocery store.

This a fabulous summertime recipe since there is no oven time required.   With spring and then summer just around the corner hang onto this recipe for the warm weather to come.

Happy Friday everyone.  Enjoy!  P.S. Photo credits to Elaine Zee.  Thanks Elaine!

I Found my Pizza Dough Recipe

Hello pizza fans.  After our recent birthday party bash I though I would share my pizza dough recipe with all of you.  My family loves pizzas, and they especially love it when it’s cooked on the charcoal grill with the Kettle Pizza attachment. If you click-through to this link for the Kettle Pizza attachment you should see a video done by my Travel Man.

After some trial and error the last few weeks I think I have found a recipe for pizza dough that is great.  I have been working to find a pizza dough recipe that I can make in my bread maker.  Then I will be able to make the pizza dough and freeze it ahead of time.  This will give me a  pizza dough inventory at a moments notice.  The challenge was to find a recipe that had good texture and would freeze well.

So the recipe that I really found that I like goes like this: and remember this is intended for a bread maker.

  • 3/4 c water about 110 degrees
  • 1 tbsp veg. oil
  • 1 tsp lemon juice
  •  2-1/4 c bread flour
  • 1 tbsp dry milk
  • 1 tbsp sugar
  • 1/2 tsp salt
  • 1 tsp dry yeast

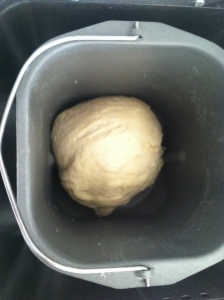
Place the ingredients into your bread maker in the order listed above.  Liquids first, then all of the dry ingredients except the yeast make a small little well in the dry ingredients, and add the yeast in this spot.  Start your bread maker on the “dough” setting and let it go.  My bread maker takes about 1 hour and 20 minutes.

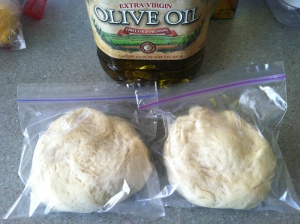
Once the dough was finished I sliced it in half, rubbed with some olive oil and placed into sandwich baggies, and then in the freezer.  One batch of this dough makes enough crust for two medium-sized pizzas, thin crust of course!  We were cooking our pizza on the stone in the grill so if they were a little misshapen when we rolled them out it was no big deal.

I’m really happy with this recipe.  I liked the texture of the dough when it came out of the bread maker.  If you have a bread maker and a craving for pizza try this out and enjoy!

Dusting off My Breadmaker

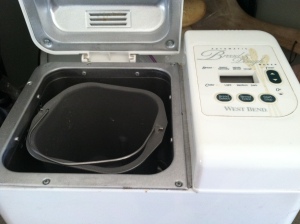
All of you have that certain small appliance sitting on your shelf collecting dust.  My shelf is pretty big, and sometimes I forgot to look in the back of the shelf to see what is there.  You know the second row of the shelf all the way in the back.   A few weeks ago, I looked back there and was reminded that I have a bread maker.  And it had quite a layer of dust on it.  So I pulled it off of the shelf, cleaned it all up, and actually found the recipe book that came with the bread maker.  I could not believe that one!  Travel Man had to replace the plug for me and then I was all set to go.

The bread maker is the easiest way to make bread known to man.  Throw your ingredients in, in the correct order of course, and voila a beautiful loaf of bread.  I had not made bread in a long, long time and everyone loved it, especially Evan.  He keeps asking me when I’ll be making more.  I made him his own personal loaf for Valentine’s Day.  He kissed the loaf of bread when I gave it to him.  Evan likes to have peanut butter sandwiches, and he told his Mom he could only eat them on the bread from Grandma now.  Too funny!

For this loaf of plain white bread the ingredients are:

  • 1 c. Water                          
  • 2¾ c. Bread Flour
  • 2 Tbsp. Dry Milk
  • 2 Tbsp. Sugar
  • 1½ Tsp. Salt
  • 2 Tbsp. Butter or Margarine
  • 2 Tsp. Active Dry Yeast

The first thing you put in the pan is the water.  Then mix the dry ingredients, except for the yeast, in a separate bowl  and add on top of the water.  Spread the dry ingredients in the pan evenly, and make a small well in the middle of the dry ingredients for the yeast.  Measure the yeast and put it into the little well.  Cut your butter into four small pieces, and place them on top of the dry ingredients in your pan.  Put the pan into your bread maker, and turn it on.

For my bread maker it was set to basic bread with a medium color crust.  Total bake time start to finish is 3 hours and 10 minutes.  Once the bread is done you just pop it out of the pan, and cool for 15-20 minutes before eating.  Then just slice, butter and enjoy.

I have made six or seven loaves of bread in the last couple of weeks.  Travel Man and I enjoyed some audacious french toast made with this bread for breakfast.  Since we have all gotten back on our calorie counting recently I will only be making bread once a week now.  Otherwise we just eat way too much.  My next experiment with the bread maker will be to make homemade pizza dough for our wood grilled pizzas.  Updates on that in a week or so.

Happy bread baking everyone!

Have you made Mini Donuts yet?

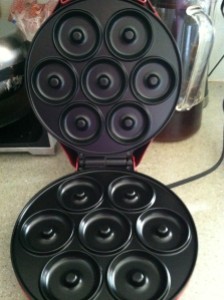
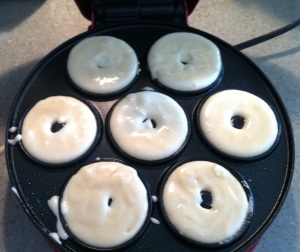
One of my Christmas presents from Travel Man was one of those little mini donut makers.  He loves getting me new kitchen gadgets, and this one was at the top of my list.

The mini recipe booklet that came with my new gadget had a few recipes, and I just wanted to try the basics.  Here’s the recipe I used:

Basic Donut Recipe:

Ingredients:

  • 1 c. flour 
  • 1/2 c. sugar
  • 1 Tbsp baking powder
  • 1 egg
  • 1/2 c. milk
  • 1/2 tsp vanilla
  • 4 Tbsp cooking oil

Directions:

  • Stir dry ingredients together.
  • Add egg, vanilla, and milk and beat 1 minute with electric mixer or vigorously by hand.
  • Add oil and continue to beat for 1 more minute.

Now you’re ready to plug-in the donut maker, and get those goodies going The donut maker just plugs into the wall, and heats up like a waffle iron.  Once heated, you spray the top and bottom with some sort of non-stick cooking spray, add the batter, close the lid, and bake until the “ready” light comes on.

Once they are baked place the little goodies on a plate or cutting board to cool.  At my house you have to guard treats like this with your life, so they don’t disappear instantaneously!

You can also frost the donuts, and dip them in sprinkles, or some other sugary delight.  For our very first round of donuts I just wanted them plain so I could tell how this recipe tasted.  The donuts were very light and delicious.  Like little cakes, but not too heavy.  Just the right amount of sweetness for me.  Left plain these little snacks would freeze very well.

The mini donuts disappeared quite quickly after I sounded the alarm that they could be eaten. I think I might try something with pumpkin next, or maybe lemon poppy-seed.  Those would be my two favorite flavors to experiment with.  What’s your favorite donut or muffin?  Have you tried the mini donuts?

  • Subscribe to Blog via Email

    Enter your email address to subscribe to this blog and receive notifications of new posts by email.

    Join 1,175 other subscribers

Skip to toolbar