Tag Archive for Martha Stewart

We Made Garden Markers

The gardening season is in full swing and I have a few projects that I’ve been meaning to share with all of you.  We are already harvesting our zucchini, and had our first grilled zucchini last week.  Oh yum.  And by the way how is it possibly the 6th of August already?  Didn’t we just celebrate the 4th of July?

I had been wanting to make plant markers for the garden so it would be easy for Evan to know what all of the plants are, and just because I thought it would be cute.  Plus I had seen a lot of ideas for the markers on Martha Stewart‘s crafting page, so I was inspired.  And as a bonus to the budget, I wanted to spend as little money as possible on this project. 

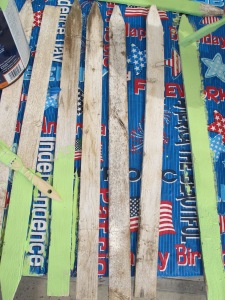
There were these dilapidated stakes from a short border fence we had taken apart at one time or another.  Great these will be my new garden markers.  Next I went into the garage and perused my leftover paint shelf.  There was this great green color just calling my name. I call it my lime sherbet paint.

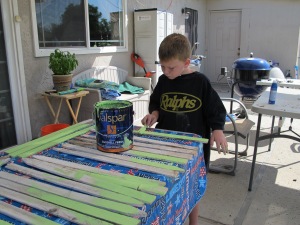
 So off Evan and I went to paint the sticks.  This was of course during one of our “Camp Grandma” days.  Evan loves to paint so I knew he would be a good helper for this project.  We painted one side of the sticks, let them dry, turned them over and then painted the second side.  This took up most of our morning, and then we went for a swim.  I left the sticks to dry overnight, so we could put the lettering on for the plant names.

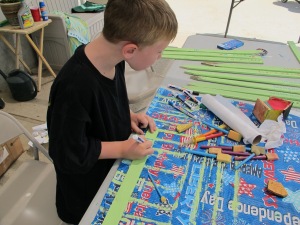
The next week at Camp Grandma we painted the plant names on the sticks.  I bought some paint pens (the only thing I had to buy!), as I knew this would make it easier for Evan to help me.  I was really glad I got them because he had a lot of fun being creative with his lettering.

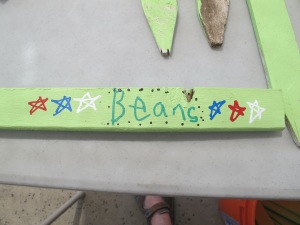
These are my favorites of everything we painted.  I love how Evan got the patriotic theme going.  And he did make one marker that says, “Evan is cool”. 

Here’s the rest of the finished markers, and how they look in the garden.

This was a great, inexpensive project.  It was fun collecting all of the supplies from “stuff” on the shelves around the garage and in the garden shed.   Evan and I had a lot of fun together, and the markers look so great in the garden.  A great summertime project.  Of course Evan had more fun making mud pies.  More on that adventure later.  Happy Monday everyone! 

A Tooth Fairy Pillow

My grandson, Evan, is six years old which means he is now losing his little baby teeth.  I found this cute little tooth fairy pillow on Martha’s Stewart’s craft page.  I thought what a great idea for him to have a little pillow to call his own.  The best part about this little pillow (other than the fact that I was making it for my favorite grandson) was I had all the scraps in my sewing closet to make it for free.  I didn’t have to do anything except put in my time and love.

I found the scrap of green first, because I wanted to make the pillow a really bright color.  Then I had to do some digging to find the white felt for the toothy. 

The process of putting the pillow together went like this:

  1. Print out the template for the tooth on some card stock, and cut out 1 piece from the felt.
  2. Cut two pieces of a 9-by-9 inch squares from the fabric you are using.
  3. Trace the cute little face on the felt.
  4. Embroider the little face on the felt with black embroidery thread.  A french knot was used for the eyes, and the back-stitch for the mouth.
  5. Then I chose to use an alternate color thread to sew the little toothy, by hand, to the front side of the pillow.  I used a back-stitch for this portion also.  Remember to leave an opening at the top of the tooth for the tooth fairy!
  6. Once the tooth is sewn on the pillow, place the two squares for the pillow, right sides together, and stitch with a ¼” seam.  Leave an opening at the bottom for turning, and stuffing.
  7. Turn the pillow right side out, and stuff with batting.  I stuffed my fairly firmly so it would hold up for a six-year-old boy.
  8. Once the pillow is completely stuffed to your satisfaction, sew the opening closed.
  9. Give the gift of love to your favorite toothless wonder.
  10. This is a great little project if you are looking for something simple and quick to sew.

The finished product.

Now on a Grandma note; Evan loved his pillow.  Although being the boy that he is when I gave it to him he decided to see if it would fly across the room like a boomerang!  Boys will be boys.  His mother told me she is not quite sure how the mechanics of the pillow will work for the tooth fairy’s sake.  We’ll update you on that front when Evan has his next tooth fairy visit.

  • Subscribe to Blog via Email

    Enter your email address to subscribe to this blog and receive notifications of new posts by email.

    Join 1,175 other subscribers

Skip to toolbar